Braiding is one of the most versatile and timeless hairstyling techniques, offering everything from simple everyday styles to intricate, elegant looks. Whether you’re a beginner or looking to refine your skills, mastering different types of braids can transform your hairstyling routine. In this Braiding 101: A Step-by-Step Guide to Different Braid Styles, we will explore a variety of braiding techniques, from the basic three-strand braid to more advanced styles like the fishtail and waterfall braid.
Why Learn Braiding?
Braiding is not just a trendy hairstyling option; it also provides several benefits:
- Protective Styling – Reduces hair breakage and promotes growth.
- Versatility – Works for casual, professional, and formal looks.
- No-Heat Styling – A great alternative to curling irons and straighteners, preventing heat damage.
- Timeless Appeal – Braids never go out of fashion and are popular across different cultures and generations.
7 step-by-step tutorials for various braid styles
1. The Basic Three-Strand Braid
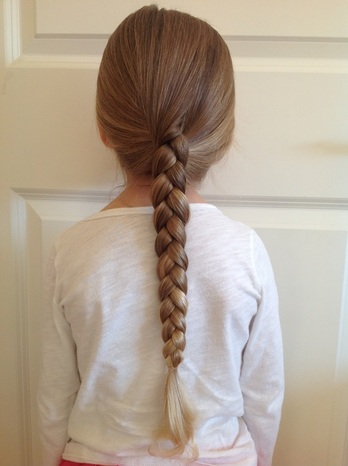
This is the foundation of most braiding techniques and the easiest to learn.
How to Do It:
- Brush your hair to remove tangles.
- Divide your hair into three equal sections.
- Cross the right section over the middle section.
- Cross the left section over the new middle section.
- Continue this pattern until you reach the end of your hair.
- Secure with an elastic band.
Best For:
- Beginners
- Everyday styling
- Quick and easy hair management
2. The French Braid
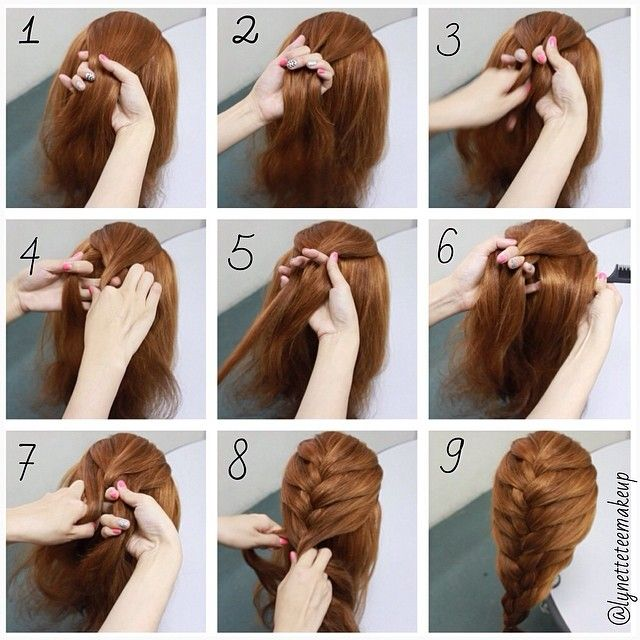
A French braid adds elegance and works well for both casual and formal occasions.
How to Do It:
- Start by taking a small section of hair from the crown of your head.
- Divide it into three equal parts.
- Begin a three-strand braid, crossing the right section over the middle, then the left over the middle.
- Gradually add small sections of hair from each side as you continue braiding.
- Continue until you reach the nape of your neck, then finish with a regular braid.
- Secure with a hair tie.
Best For:
- Medium to long hair
- Active lifestyles (stays secure throughout the day)
- A polished, professional look
3. The Dutch Braid
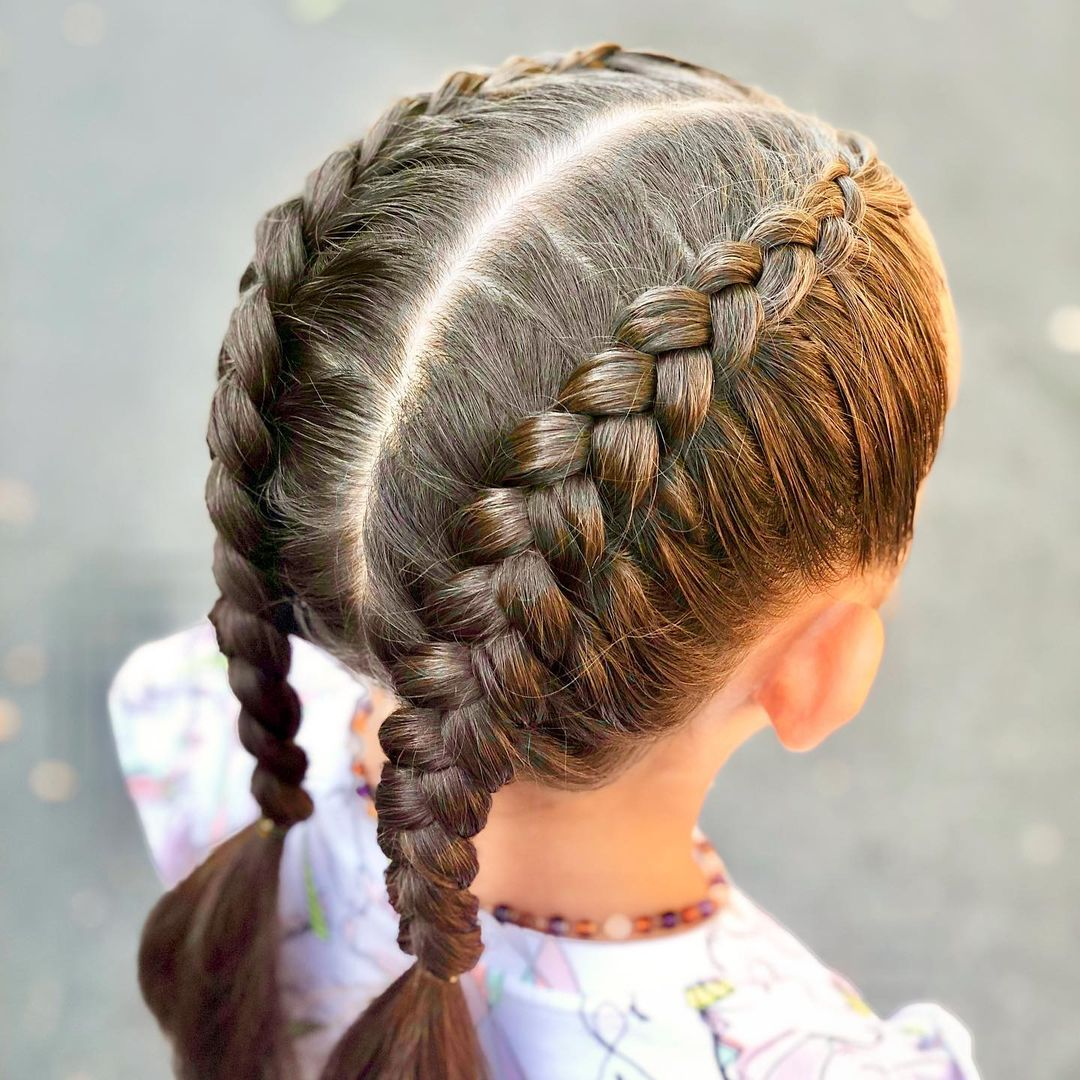
Also known as the reverse French braid, the Dutch braid sits on top of the hair, creating a more defined look.
How to Do It:
- Start with a section of hair at the top of your head.
- Divide it into three strands.
- Instead of crossing sections over the middle, cross them under.
- Continue adding hair from each side as you braid downwards.
- Finish with a standard three-strand braid and secure with a band.
Best For:
- Those who want a more voluminous braid
- Hairstyles that require a textured look
- A stylish alternative to the French braid
4. The Fishtail Braid
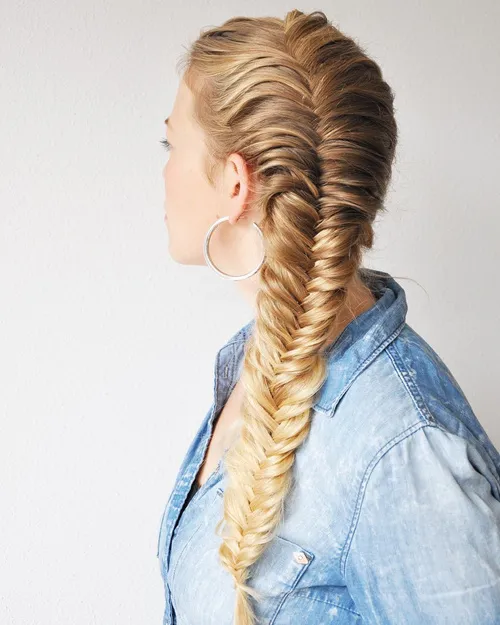
The fishtail braid gives an intricate, woven appearance but is surprisingly easy to do.
How to Do It:
- Split your hair into two equal sections.
- Take a small strand from the outer edge of the right section and cross it over to the left section.
- Repeat the process on the left side, taking a small strand and crossing it over to the right section.
- Continue alternating until you reach the ends of your hair.
- Secure with a hair tie and gently pull the braid apart for a fuller look.
Best For:
- Romantic and bohemian styles
- Special occasions
- Those who want a textured, detailed braid
5. The Waterfall Braid
This braid creates a cascading effect, making it a beautiful choice for weddings or elegant hairstyles.
How to Do It:
- Start with a small section at the front of your hair and divide it into three parts.
- Cross the top section over the middle, then the bottom section over the middle.
- Drop the bottom section and replace it with a new section of hair from the top.
- Continue this pattern, dropping and adding new sections until you reach the back of your head.
- Secure with bobby pins or continue with a regular braid.
Best For:
- Long, flowing hair
- Elegant events and special occasions
- Creating a soft, romantic look
6. The Box Braids
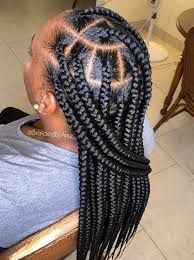
A popular protective style, box braids involve sectioning the hair into square-shaped parts and braiding them with or without extensions.
How to Do It:
- Section your hair into small squares using a comb.
- Take one section and split it into three strands.
- Braid tightly downwards, adding extensions if desired.
- Secure the ends by dipping them in hot water if using synthetic hair.
Best For:
- Protective styling for natural hair
- Long-lasting hairstyles (can last weeks)
- Reducing daily hair maintenance
7. The Halo Braid
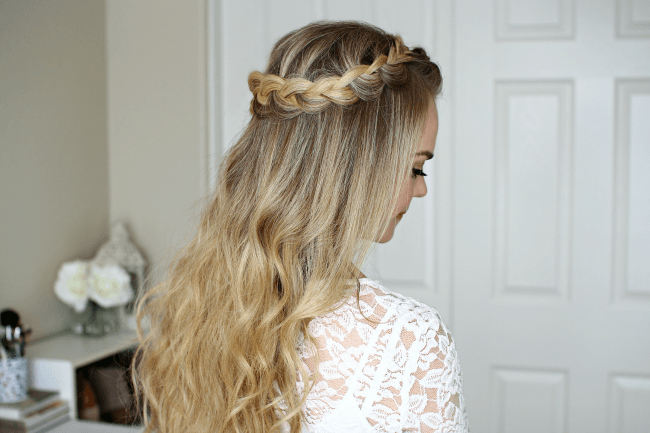
This braid wraps around the head, creating a crown-like effect.
How to Do It:
- Part your hair down the middle and create two Dutch braids on each side.
- Continue braiding around the head, following the hairline.
- Once you reach the back, pin the ends securely with bobby pins.
- Adjust for a neat and polished look.
Best For:
- Elegant updos
- Wedding and formal hairstyles
- Keeping hair off the face
Braiding Tips for Beginners
- Start with dry, tangle-free hair – Brushing beforehand helps prevent knots.
- Use hair products for grip – A little styling mousse or hairspray can keep braids in place.
- Practice on someone else first – It’s easier to learn the technique on another person’s hair.
- Loosen braids for a fuller look – Gently pulling the braid apart adds volume and a more relaxed style.
- Secure with the right tools – Use strong hair ties and bobby pins to keep your braids intact.
final thought
Braiding is a valuable skill that allows for endless creativity in hairstyling. This Braiding 101: A Step-by-Step Guide to Different Braid Styles has introduced you to a range of styles, from simple everyday looks to intricate and elegant designs. With practice, you can master these techniques and create stunning braided hairstyles for any occasion. Whether you’re aiming for a classic three-strand braid or a trendy fishtail, the possibilities are limitless.